This is just beginner’s guide to creating a brand-new C# projects in Visual Studio 2022 and .NET 6.0. Basically, it creates a solution that contains two projects – first one being ASP.NET Core Web API, and the the second one being a .NET 6.0 Console Application.
According to Microsoft, “A solution is a container to organize one or more related code projects, like a class library project and a corresponding test project.” It’s basically a workspace – a term which I prefer but which Microsoft has put an end to (but, that’s another discussion for another time).
The apps we’ll create will not actually do anything useful – the web app just returns a a json data and displays it in a browser, the other app just displays Hello World! in a console window. Nevertheless, it demonstrates how easy it is to get something working .NET and Visual Studio in no time.
In summary, these are the things we’ll do:
- Create a solution with a ASP.NET Core Web API project in it.
- Create a Console Application within the same solution.
Let’s get started!
Create a solution with a ASP.NET Core Web API project in it
Open your Visual Studio. The first dialog window will ask you which project template you want to use. Depending on what you want to do, you can choose projects that let you create a web application with Razor pages, a Blazor application, a Console, or an MVC. For now, we choose ASP.NET Core Web API. Then, click Next.

Next window is called Configure your new project. For Project name, enter MyWebAPIApp (but you can enter any name you want). For Location, accept default or browse to desired directory. For Solution name, enter MySolution.
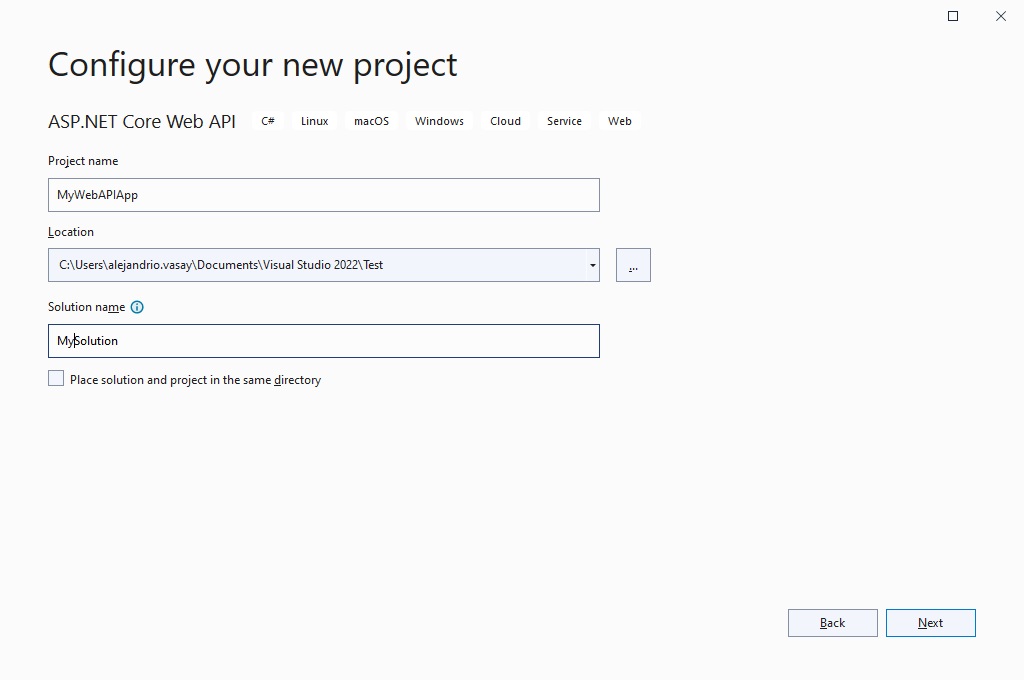
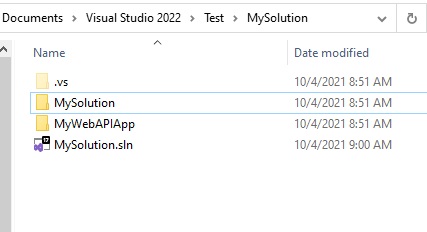
For the checkbox that says Place the solution and project in the same directory , personally, I never check it, unless you want the solution and project files in the same directory. It is really a personal preference. Below is the directory structure of either one. Check out the difference below.
Solution and project are in different directory looks like this:
Solution and project are in the same directory looks like this:
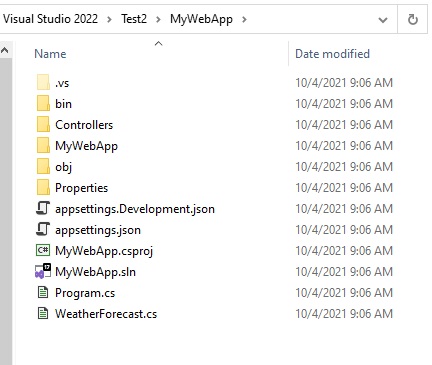
If you do place them in the same directory, Visual Studio will not let you choose a different name for your solution name; that is your solution name will take its name from the project name. Personally, I like the first one better because the files and folders of the project is not mixed in with the solution.
After you have entered all your info click Next. You will then get the Additional Information window. For Target framework choose .NET 6.0. Then, click Create.
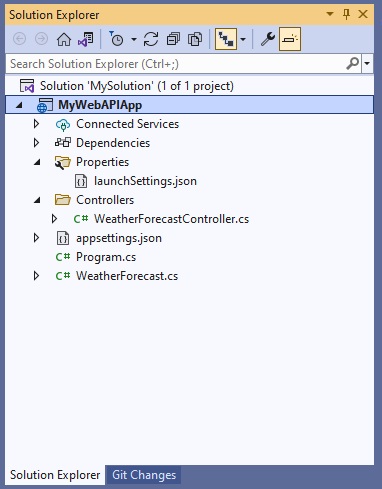
Your Solution Explorer will now look like this. You have MyWebAPIApp within MySolution.
You can run your program by doing one of these 3 things:
- Press Ctrl-F5, which runs the program without the debugger.
- Press F5, which runs the program in a debug mode, and which I do all the time.
- In Visual Studio, just below the top menu(illustrated below), click the green button. By default you will run in Debug mode, but you can click the drop down menu and change it to Release. Again, I’m always in debug mode when I am developing my application.

When the program runs, a browser will open to http://localhost:5000/weatherforecast. WeatherForecast is a web application that came with the project template/

Let’s now create a second project!
Create a Console Application Within the Same Solution
In the Solution Explorer right-click the MySolution solution on top. Click Add. Click New Project. Then you will get the Add a new project window.
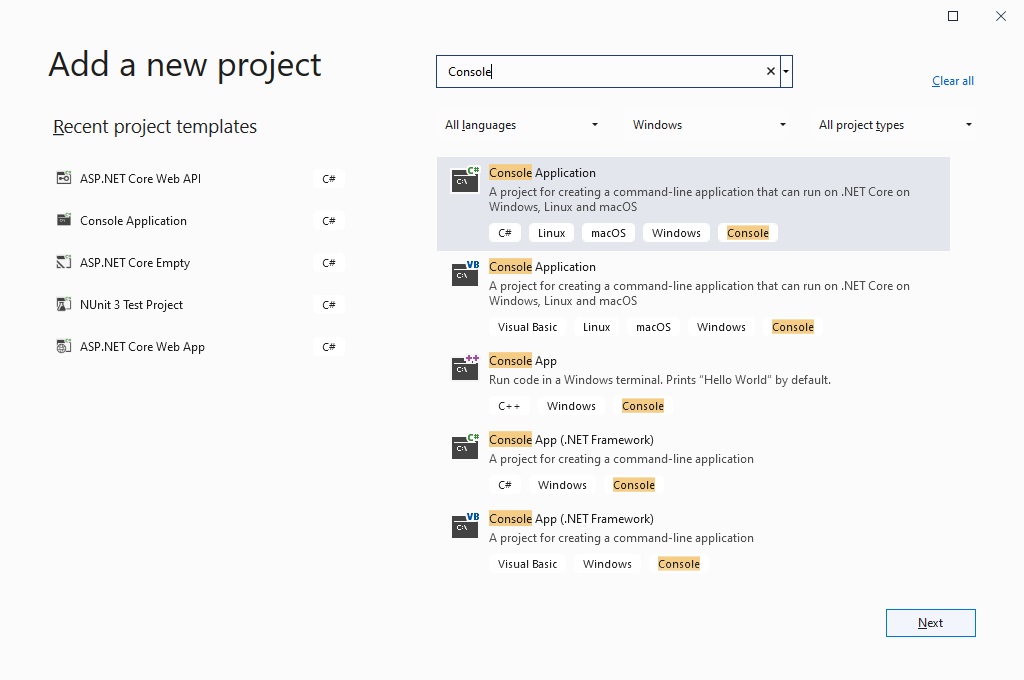
Look for Console Application. If you can’t find it, search Console in the search bar. Then, choose the Console Application that has C# in the icon (Or you may choose another language if you prefer). Click Next. You now get the Configure your new project.
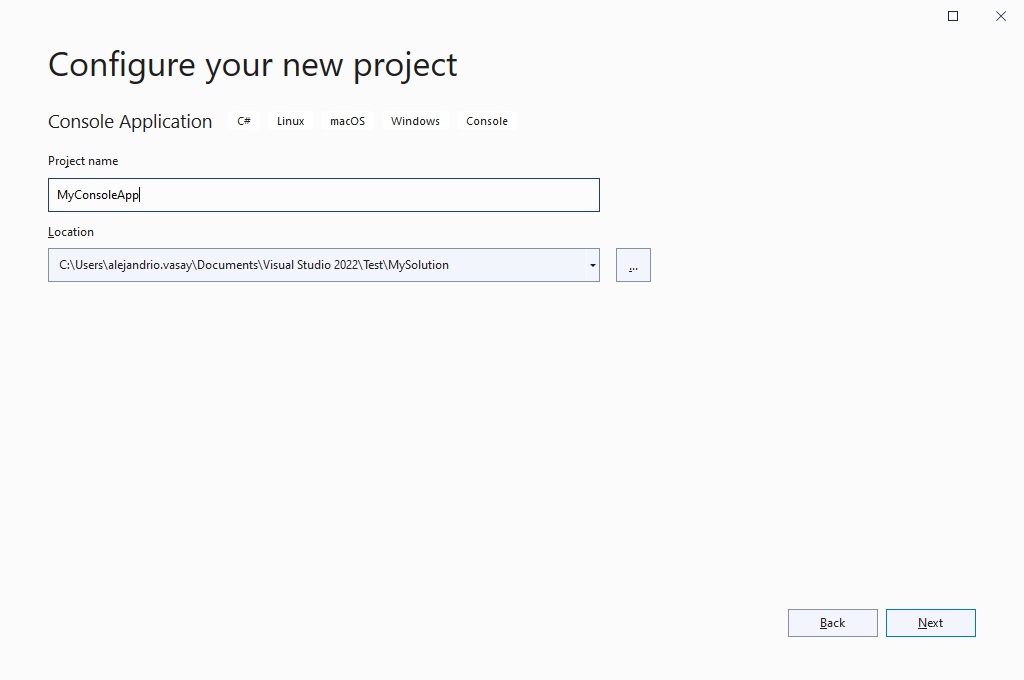
For Project name, enter MyConsoleApp. For Location, accept default or browse to desired directory. Click Next. You now get the Additional information window.
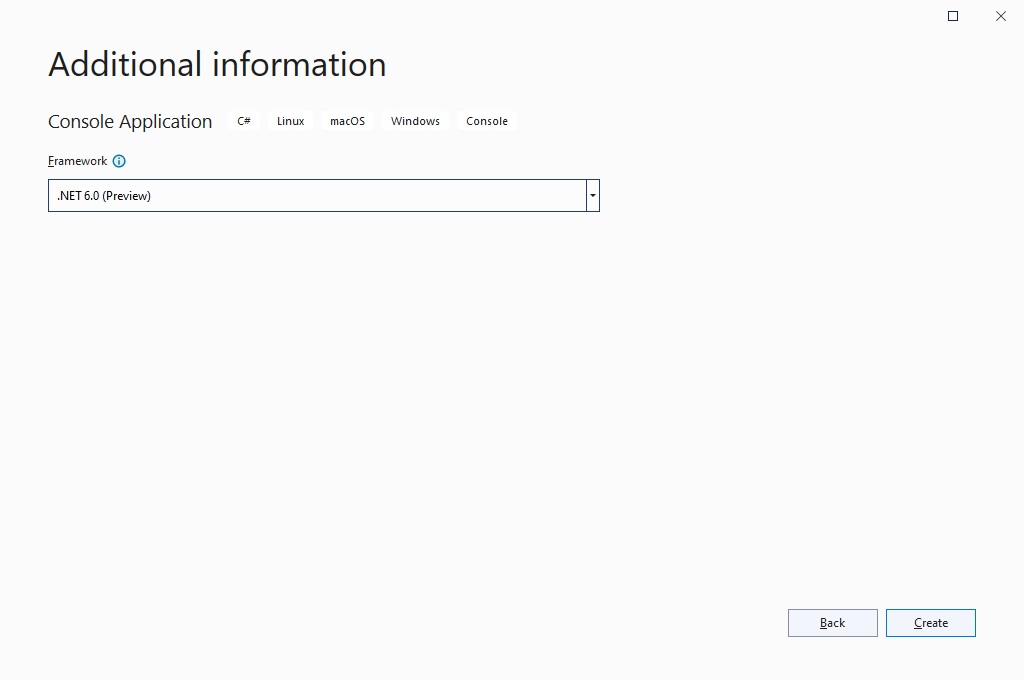
For Framework, accept default, which most of the time is the latest .NET version or click dropdown to search for other versions. Then, click Create. After the project is created, you now have a MyConsoleApp within MySolution as illustrated below.
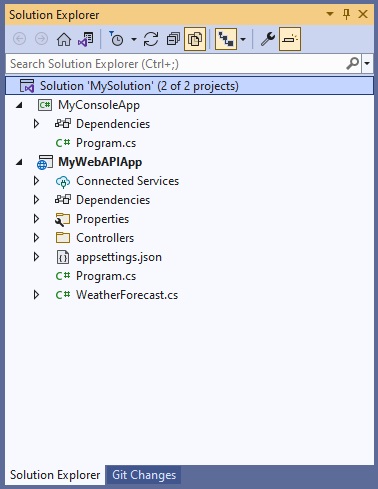
To make MyConsoleApp the active project, right-click it, and click Set as Startup Project. It is now the active project.
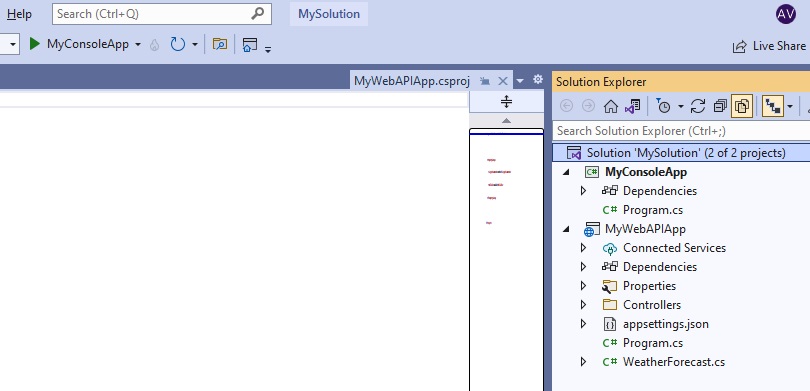
It now runs by default when you hit F5 or click the green arrow on the top bar. When you run the application, you get a console window that displays Hello World!
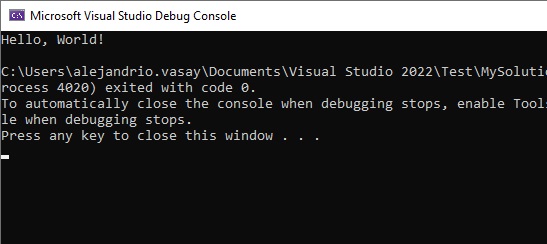
Where does the the Hello World! comes from? It’s from the program file called Program.cs and it contains this single line of code.
Console.WriteLine("Hello, World!");And by the way, this is a far cry from the code from the previous version of .NET (below).
using System;
using System.Collections.Generic;
using System.Linq;

namespace MyApp // Note: actual namespace depends on the project name.
{
    public class Program
    {
        public static void Main(string[] args)
        {
            Console.WriteLine("Hello World!");
        }
    }
}
The top-level statement feature of .NET 6.0 has removed the unnecessary lines of codes. I actually like it!
You may practice with Add some code like this example from Microsoft:
Console.Clear();

DateTime dat = DateTime.Now;

Console.WriteLine("\nToday is {0:d} at {0:T}.", dat);
Console.Write("\nPress any key to continue... ");
Console.ReadLine();

// The example displays output like the following:
//     Today is 10/26/2015 at 12:22:22 PM.
//
//     Press any key to continue...
Enter those code right after Console.WriteLine("Hello, World!");. When you run it, it should give you today’s date. The ReadLine() command will wait for you to press a key in which case it will close the console window.
Conclusion
Visual Studio allows you to quickly create a project or projects that is contained in a solution. You can create as many projects as you like inside this solution. These projects can be created from project templates such as Console Application, ASP.NET Core Web, Blazor WebAssemby App, Class Library, etc., and can be run immediately. These bootstrap projects make it really easy for developers to get started with coding.
